Creating invoices and quotes
The everyday way to make one: chat it in the way you'd type a WhatsApp message, and ChatBill writes it up. Invoices and quotes work exactly the same way, so every screenshot below applies to both: this guide only shows an invoice being made and calls out anywhere a quote differs. Each step shows the website on the left and the Android app on the right. Both run the same bot, so pick whichever one you're using.
-
1. Start from your dashboard
+ New invoice and + New quote sit at the top of your dashboard, above the money figures. Click whichever one matches what you're making.
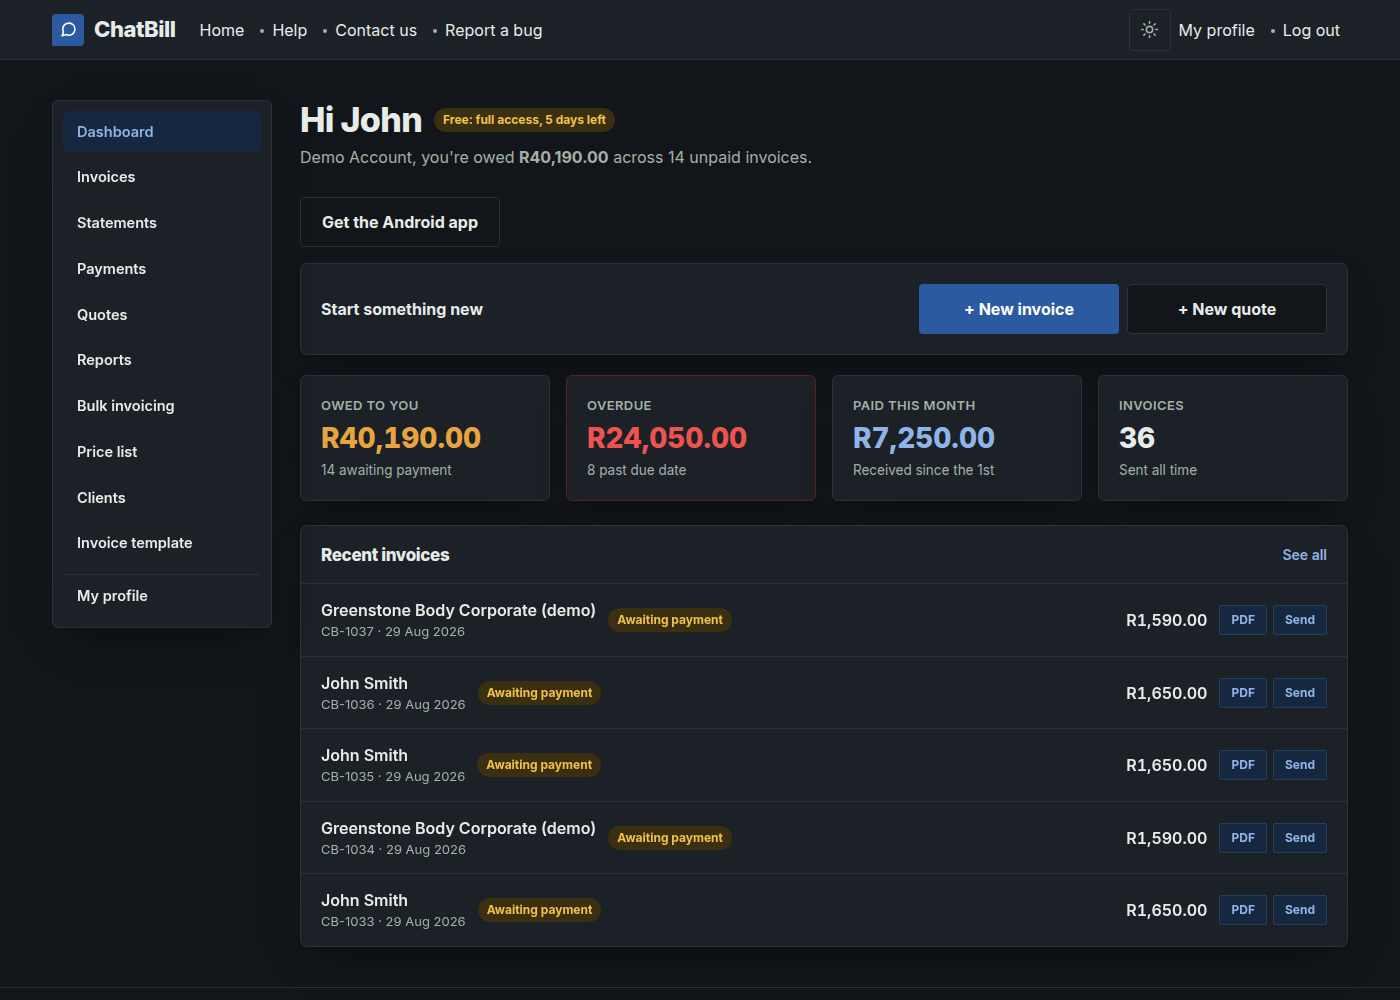 Website
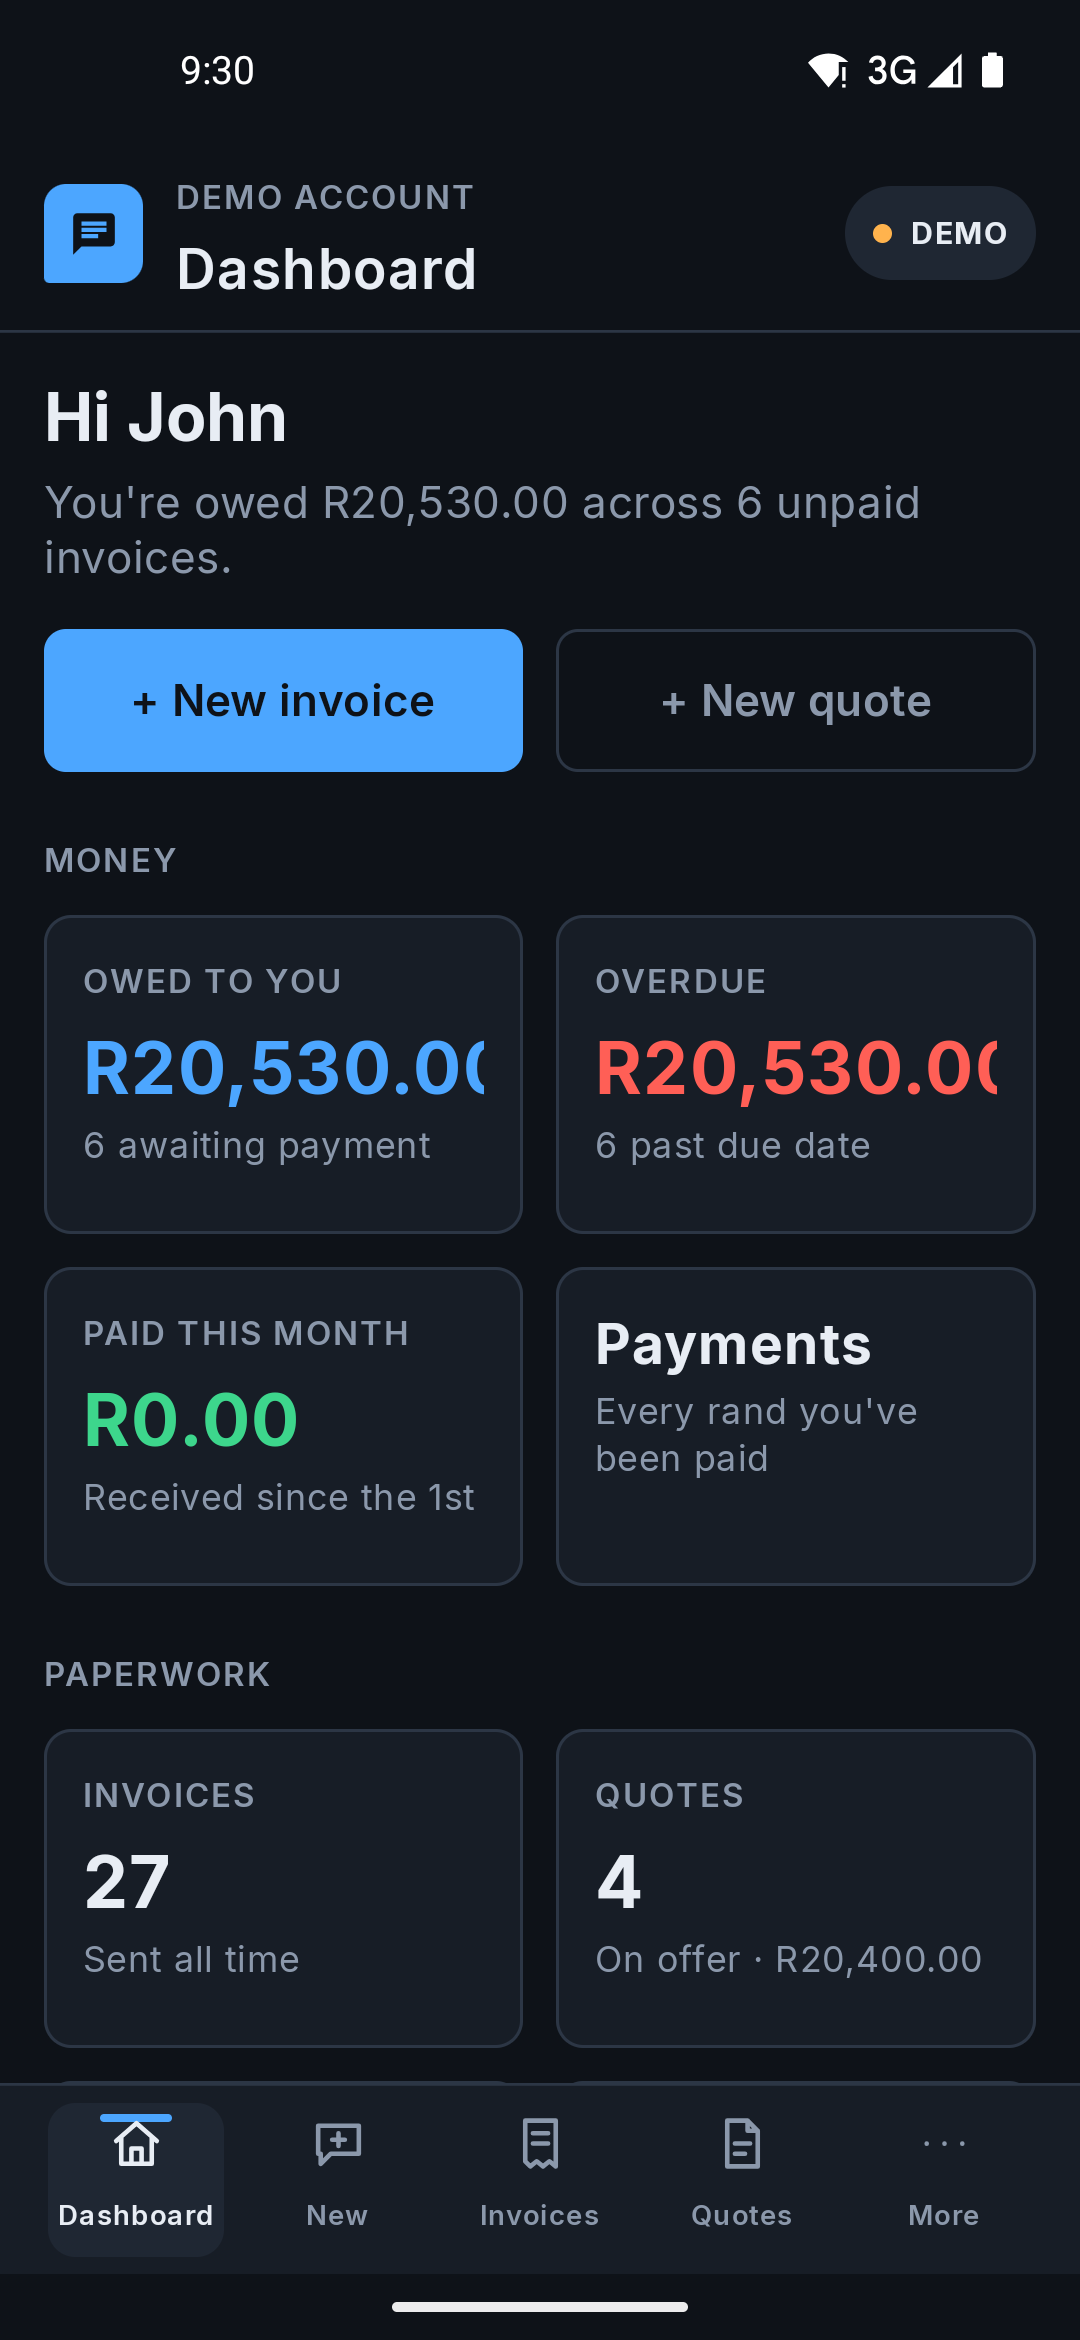 Android app
 -
2. Choose how you want to make it
A popup asks Chat it in or A saved client. Chatting it in is the way described here and needs nothing set up first. A saved client is for repeat customers whose details you've already stored, and that's its own guide. Both are on every plan.
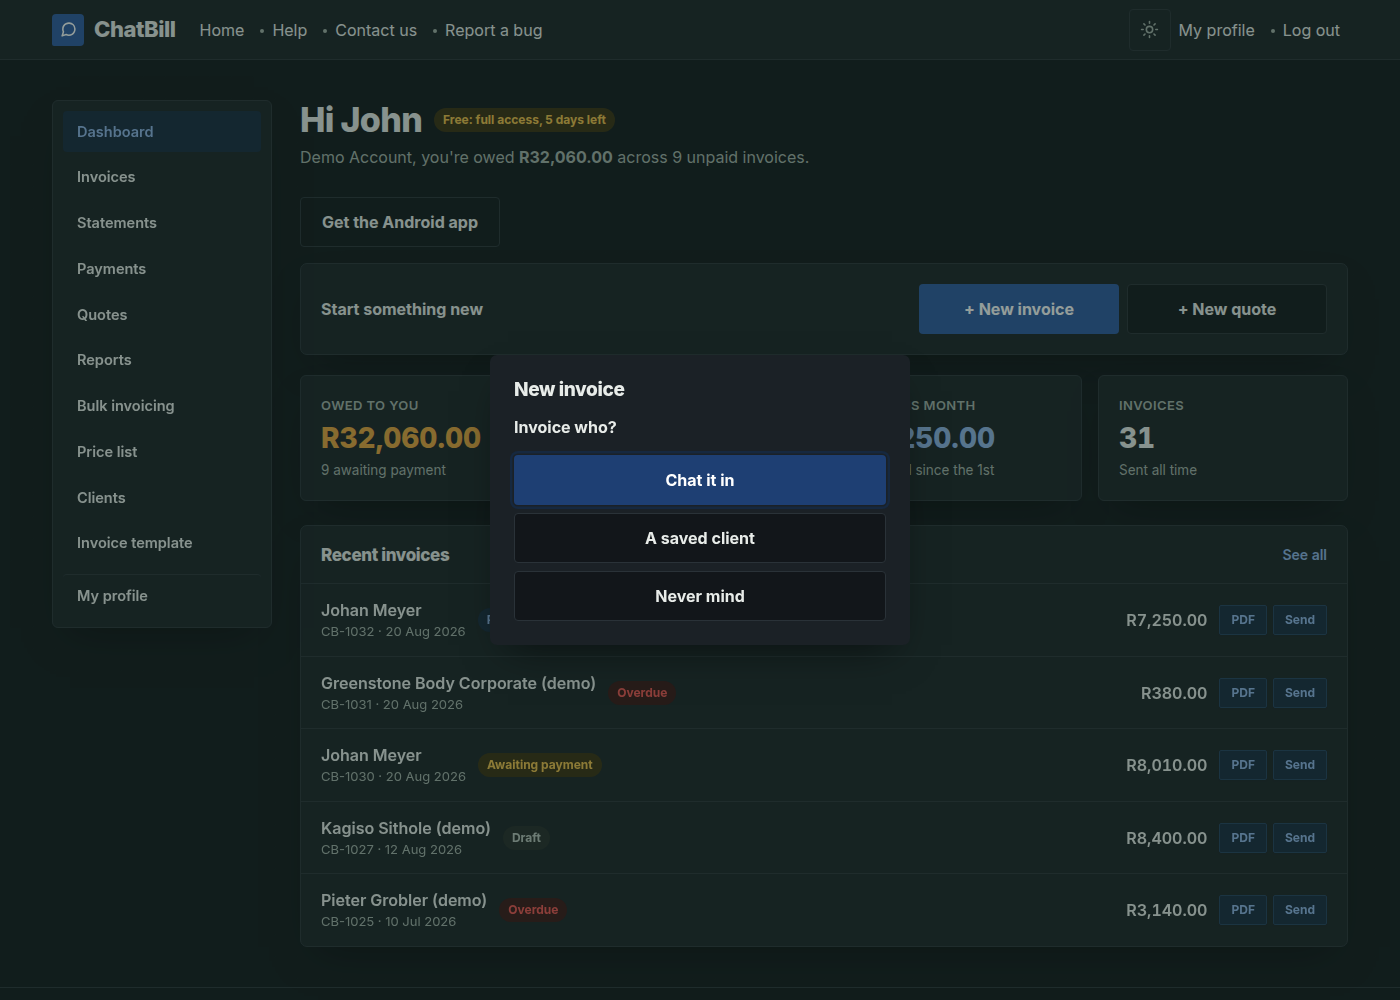 Website
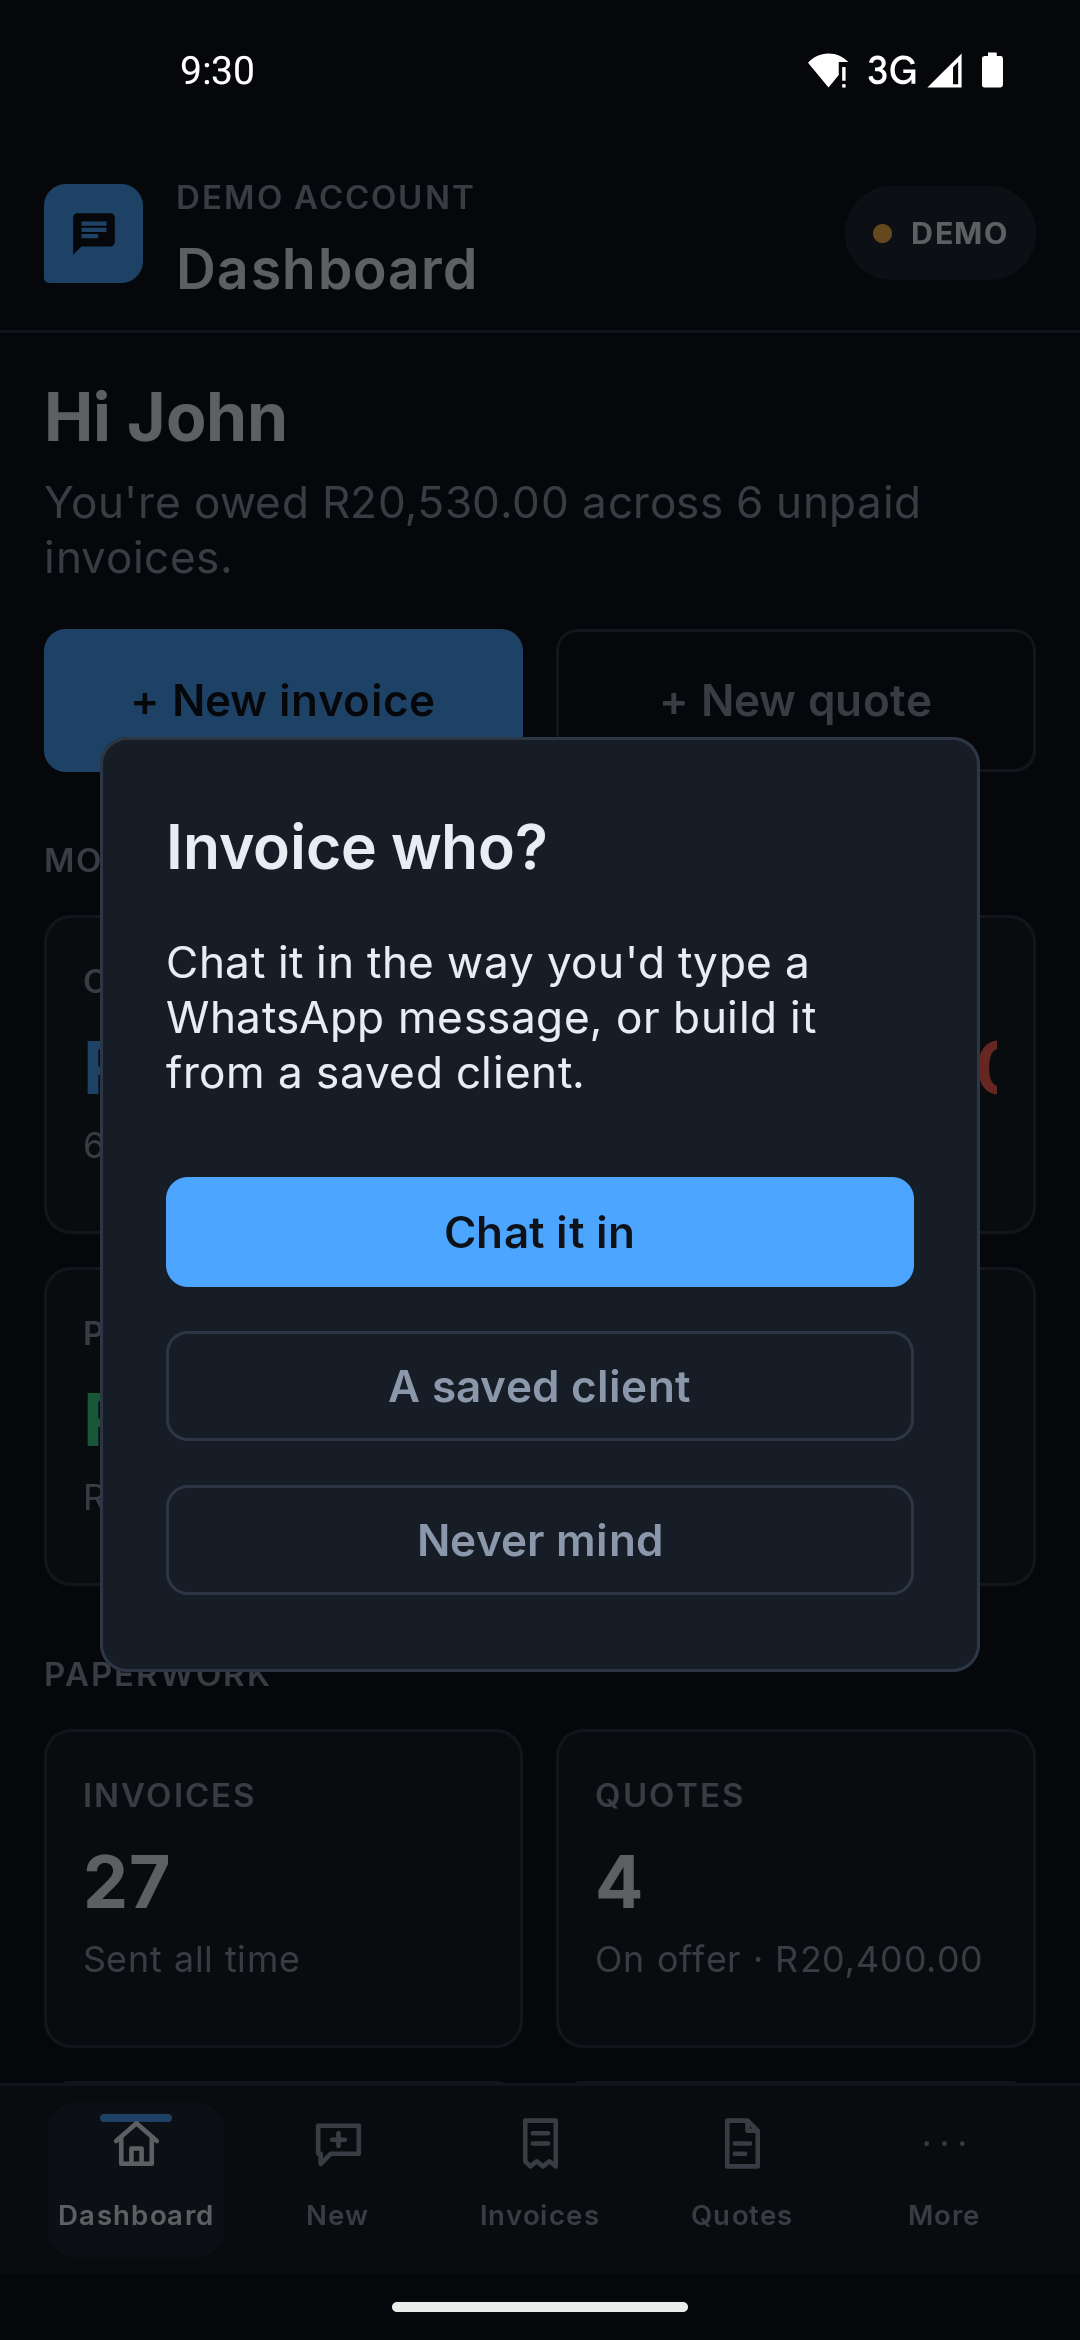 Android app
 -
3. Tell it who it's for
A short form asks for the customer's cellphone number (or email) and their name. Fill both in and continue: the chat that opens already has them filled in, so you only have to type the job.
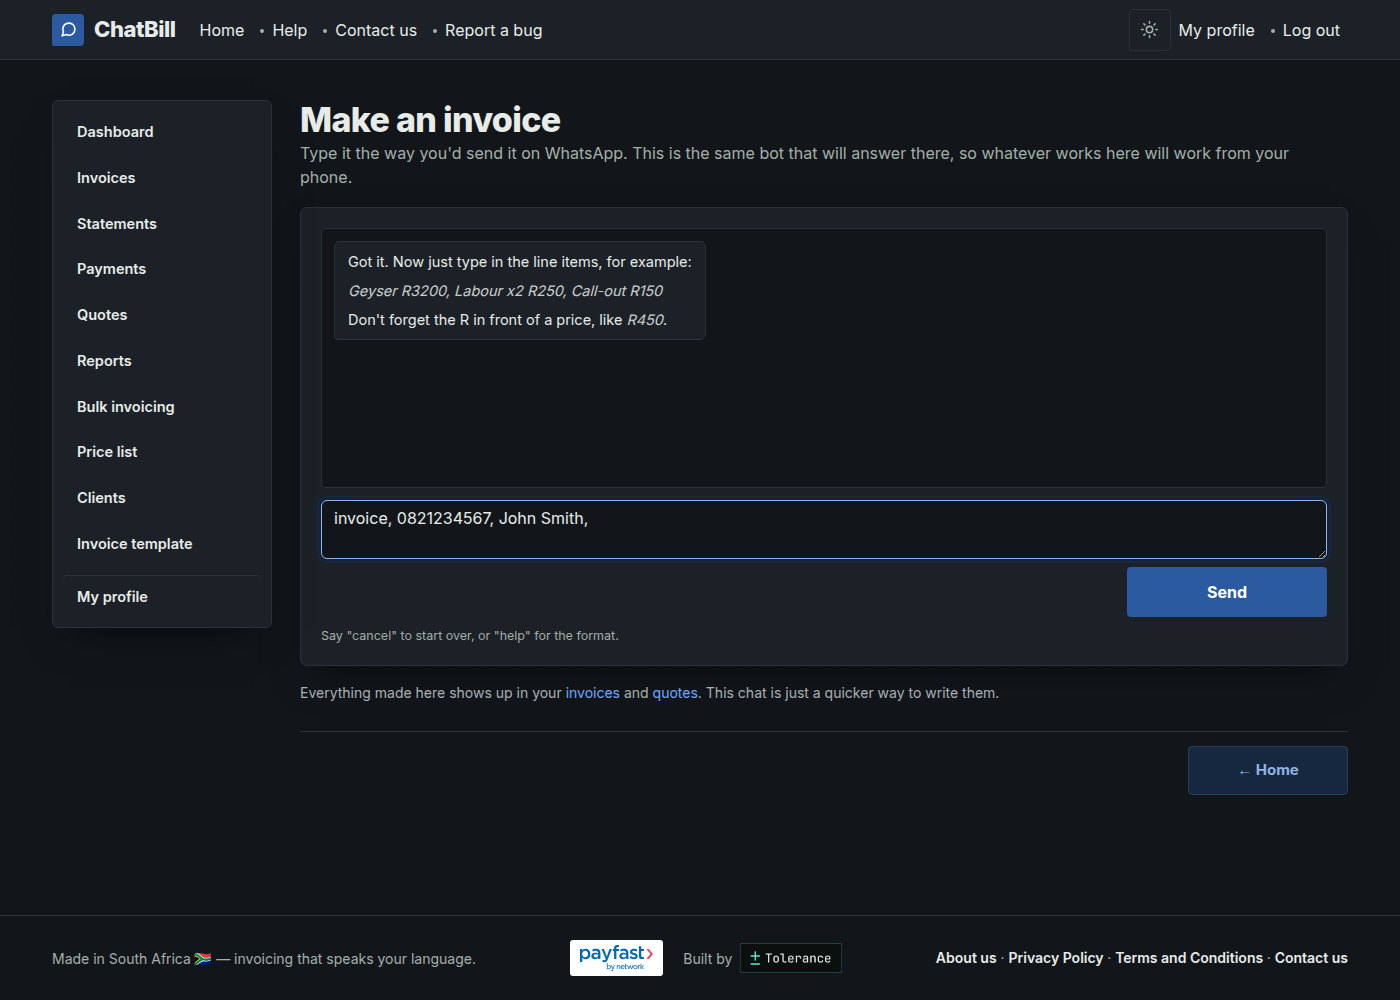 Website
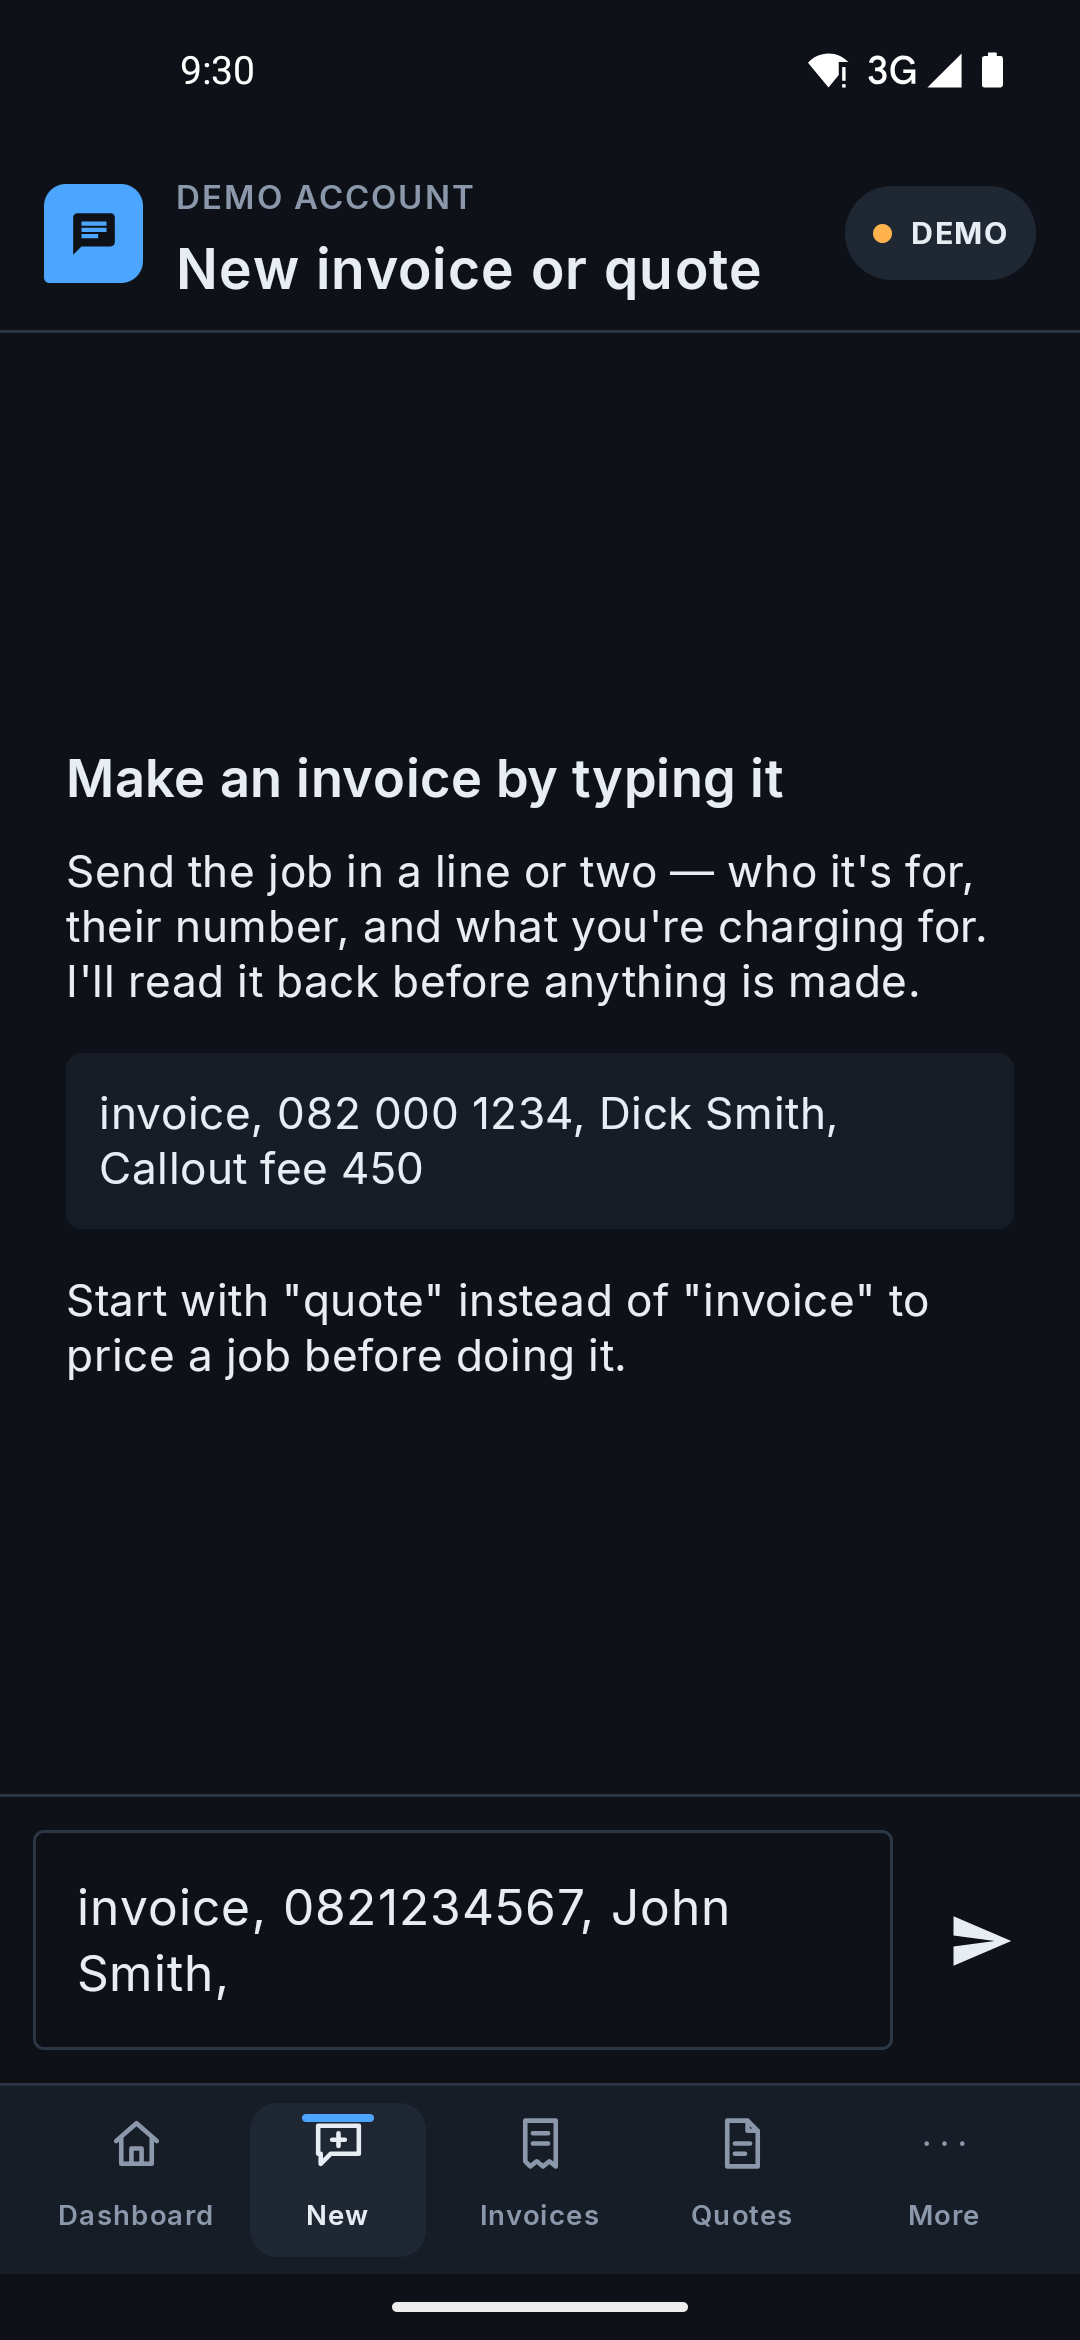 Android app
 -
4. Type the job, the way you'd say it
Add what was done and what it costs, separated by commas, like geyser repair R850, 2 hours labour R400. Don't forget the R in front of a price. Send it, and ChatBill reads back what it understood as a summary before asking whether to go ahead.
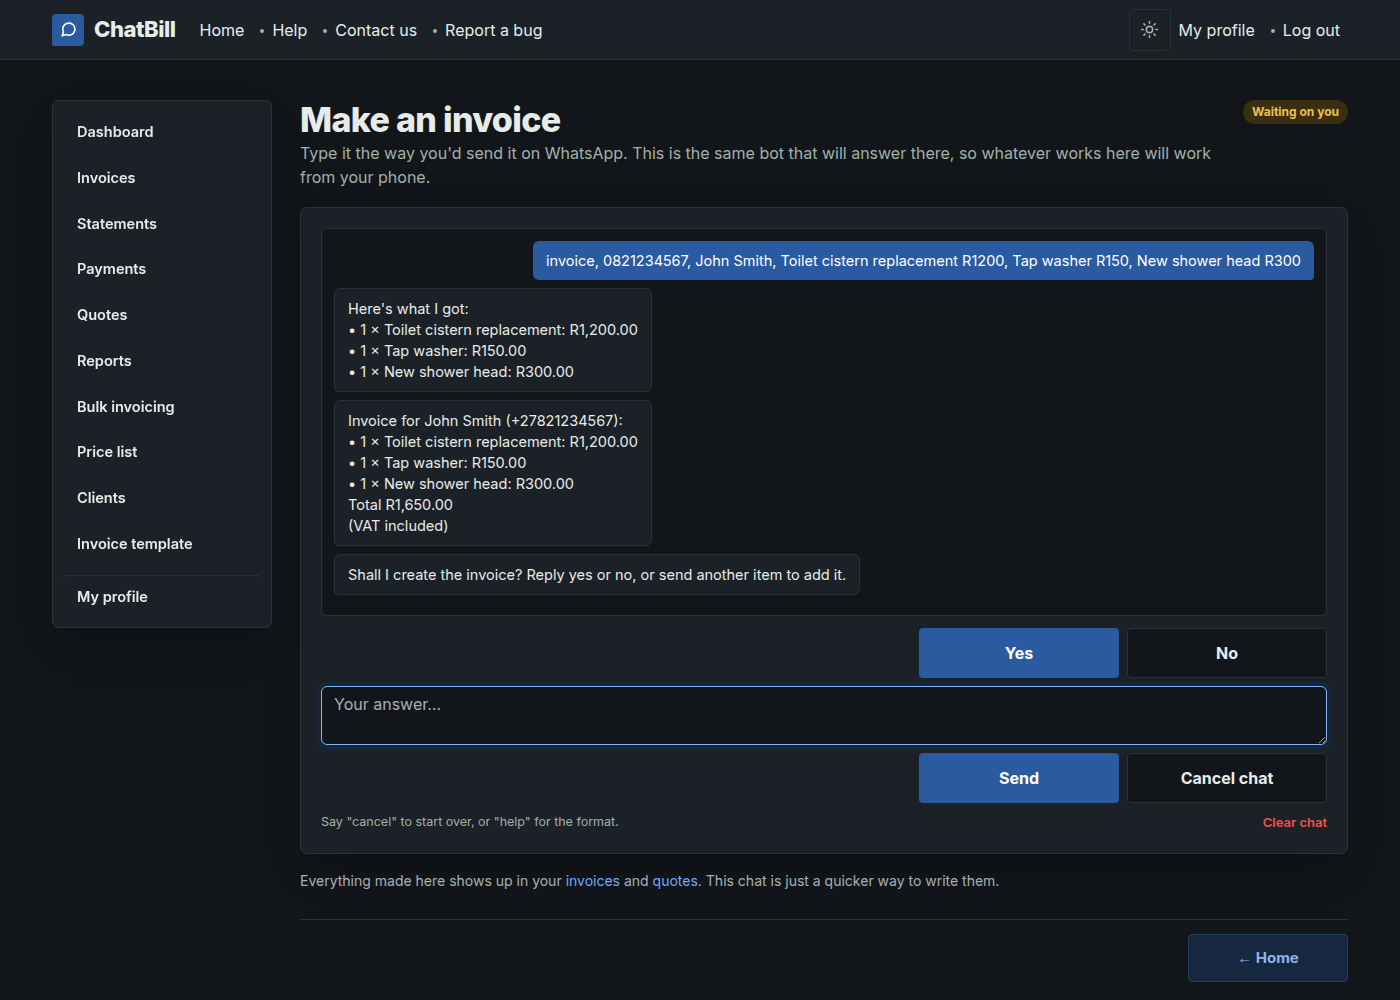 Website
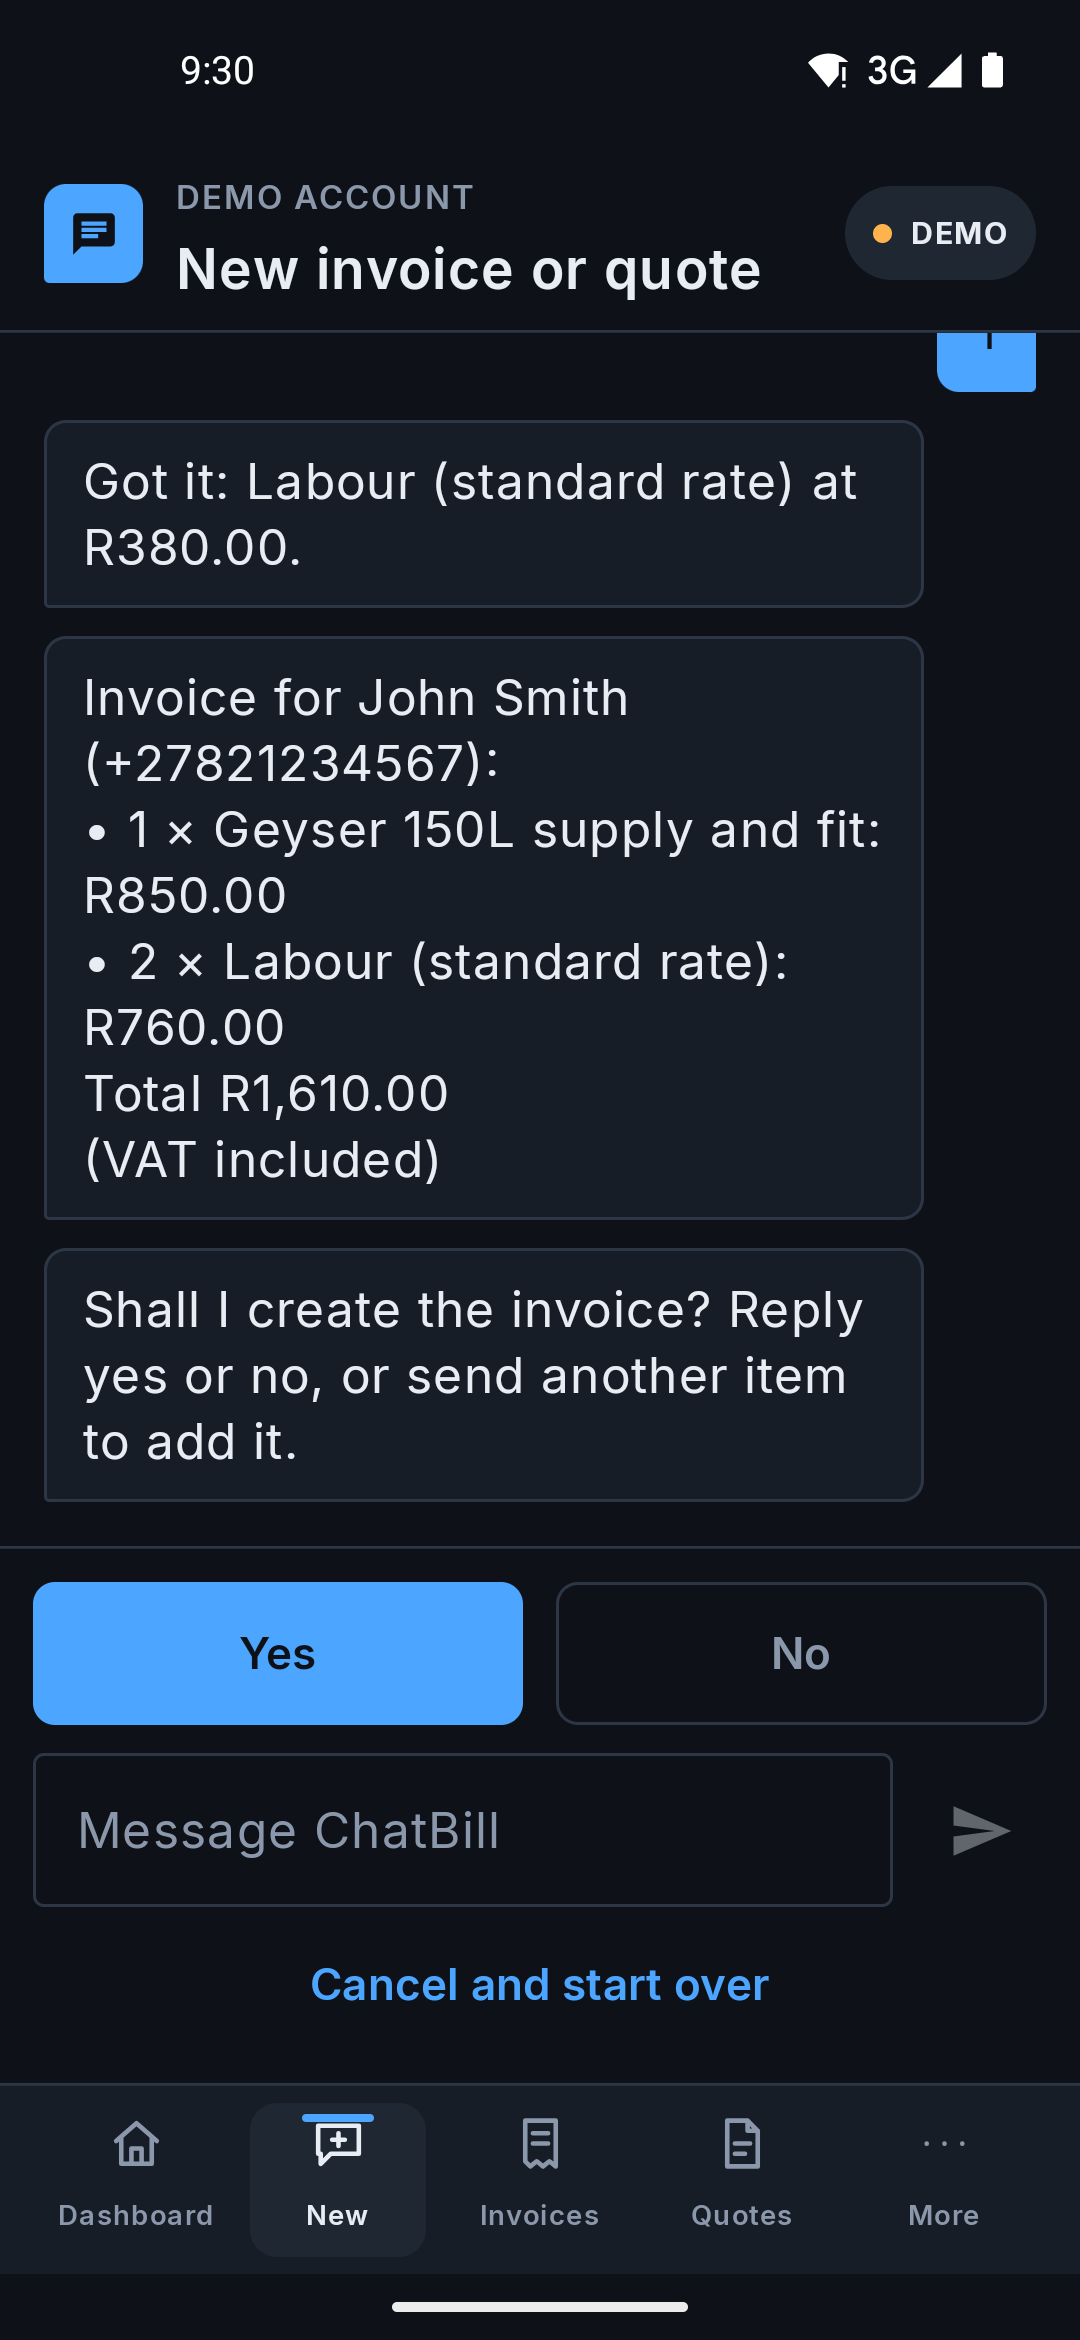 Android app
 -
5. Confirm, and it's done
Reply yes (or tap the Yes button) and the invoice is created on the spot, numbered and ready. From here you can send it straight to your customer on WhatsApp, with the message already written.
A quote says much the same thing, except it's clear that nothing is owed until the customer actually accepts it.
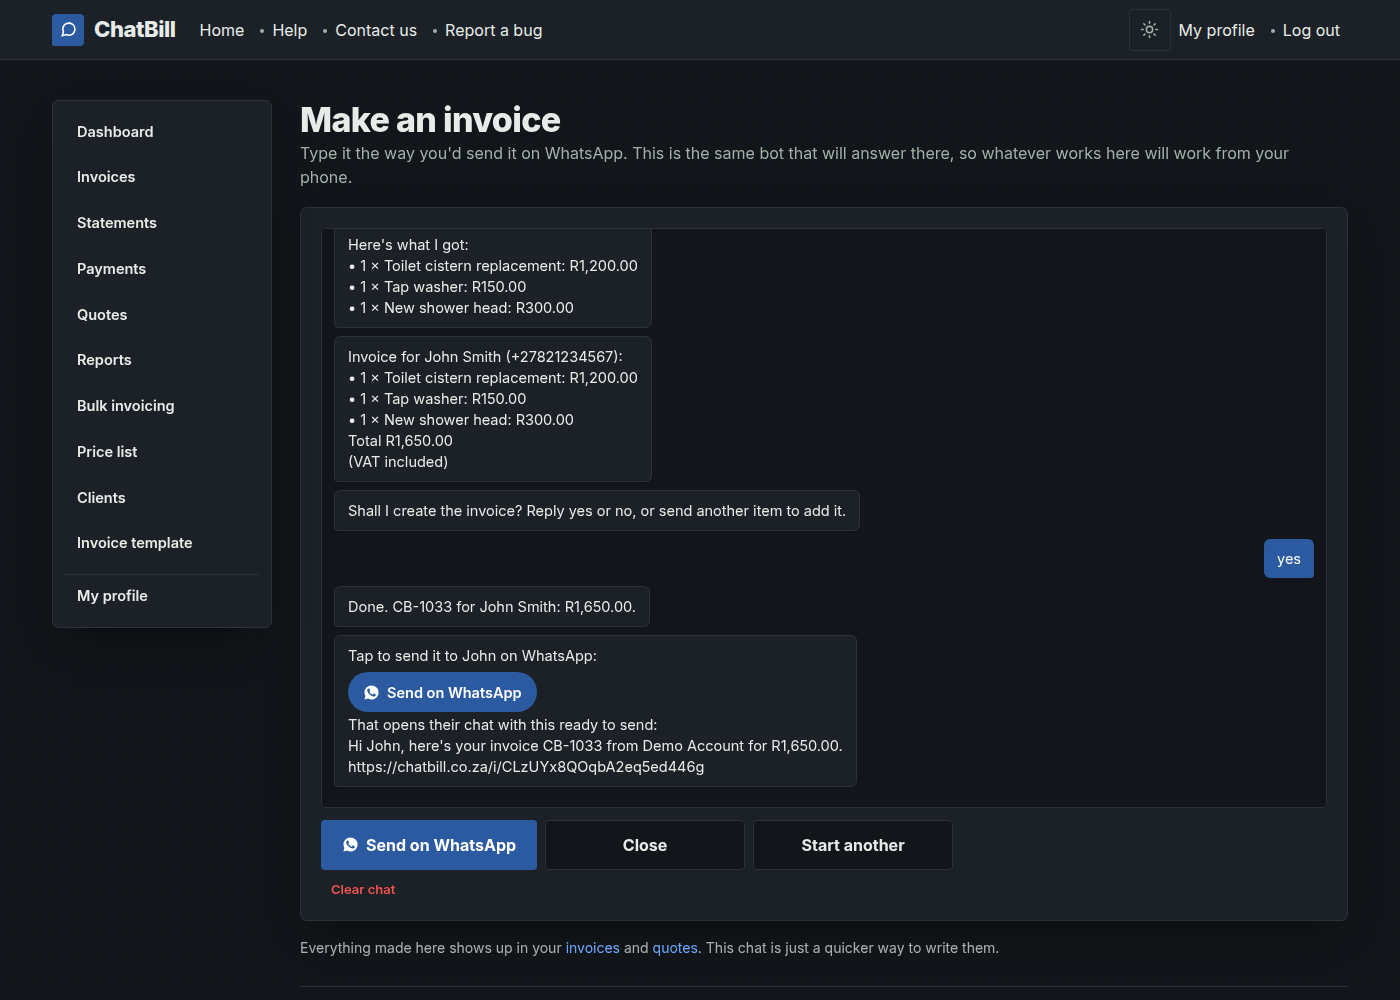 Website
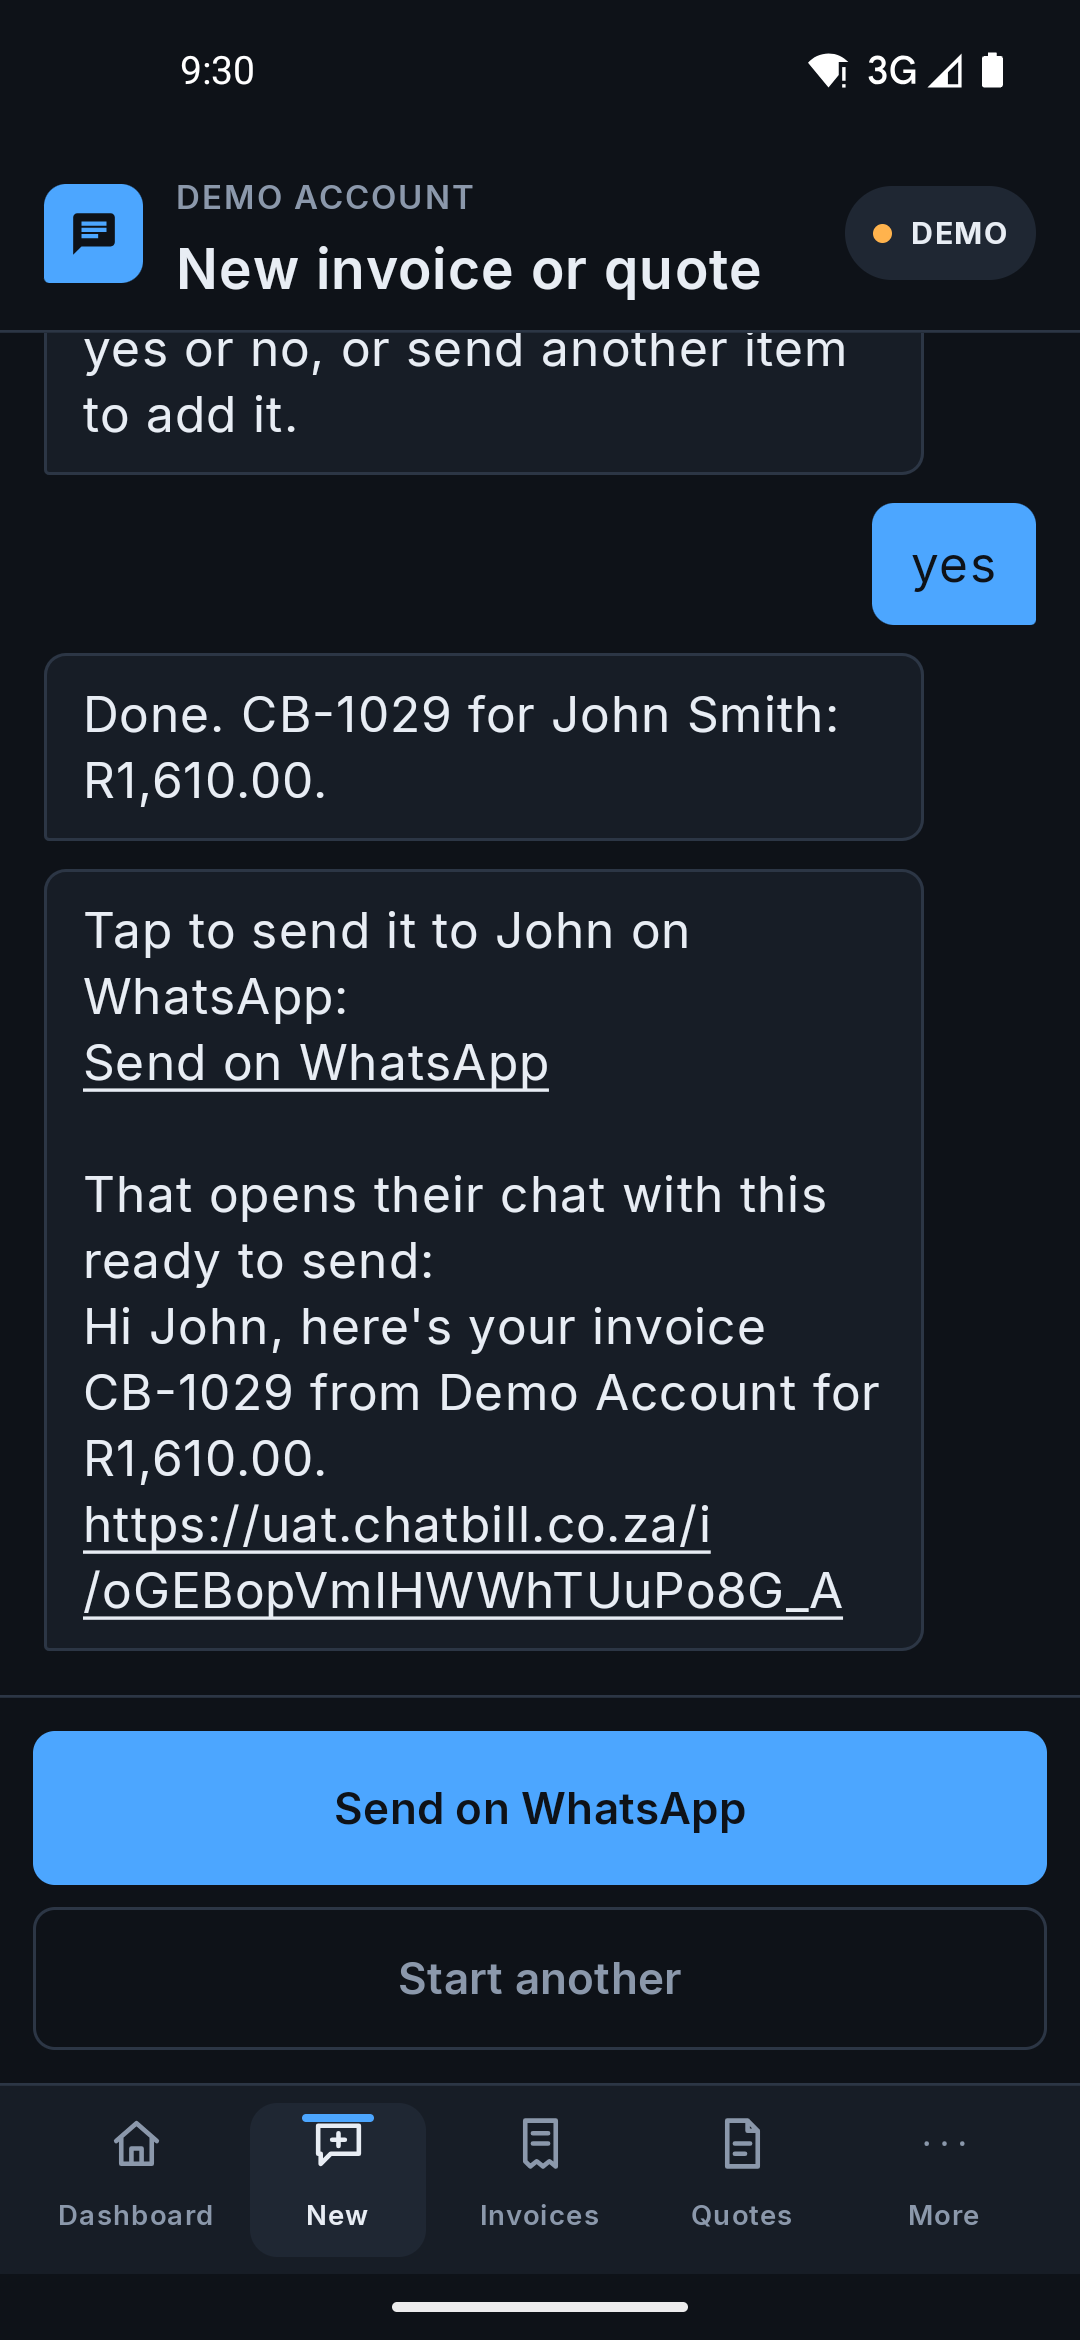 Android app
 -
6. Find it again anytime
Every invoice and quote you make this way lands in your Invoices and Quotes lists. The chat is just a quicker way to write them, not a separate place they live. Open one to view the PDF, send it another way, or record a payment against it.
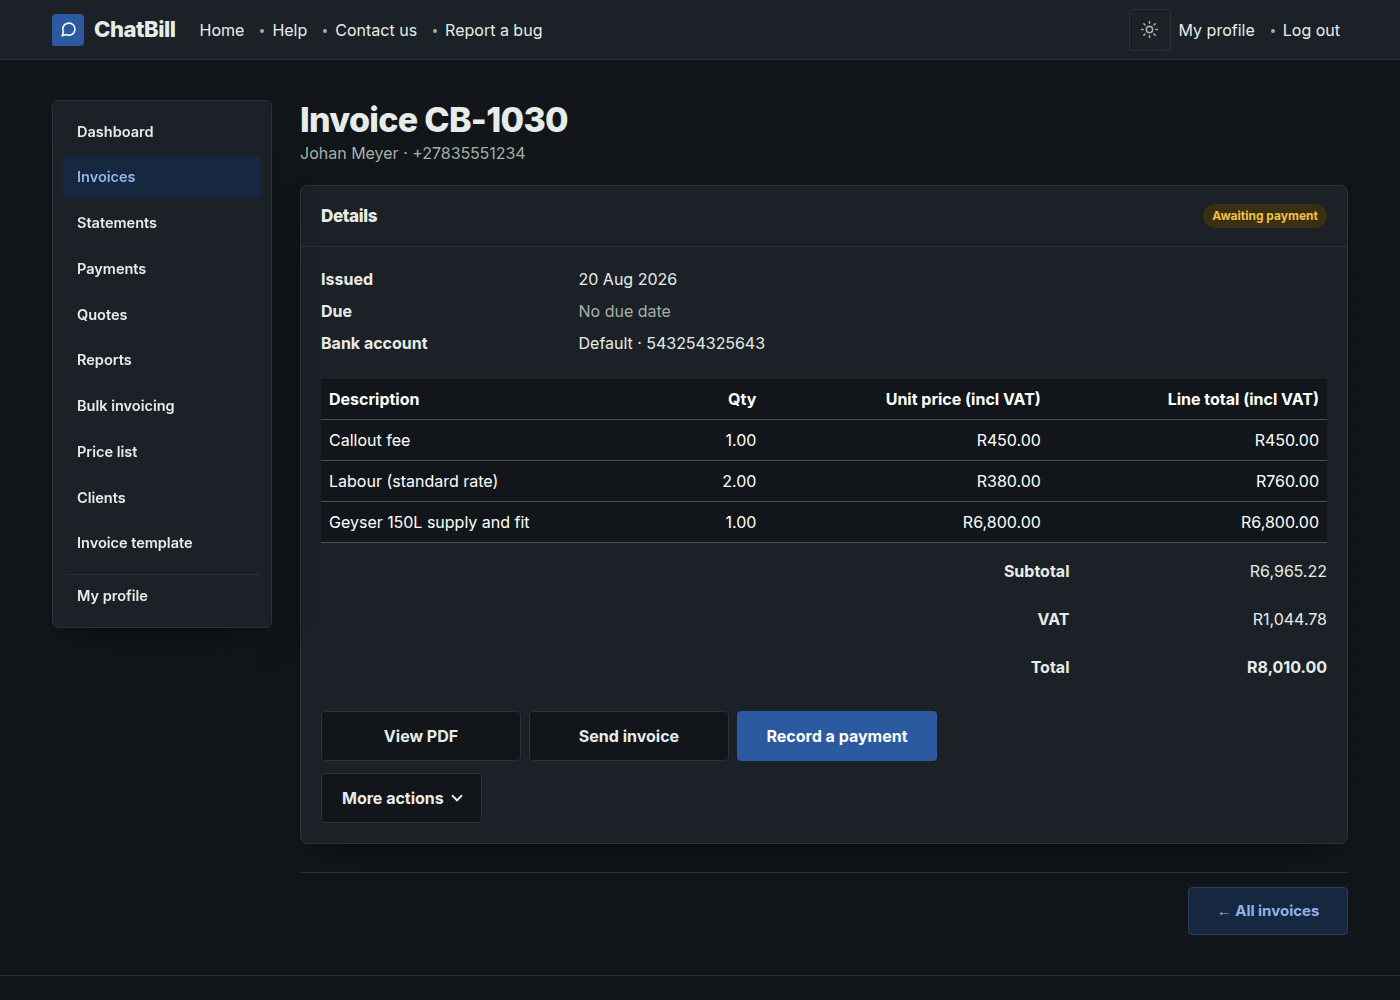 Website
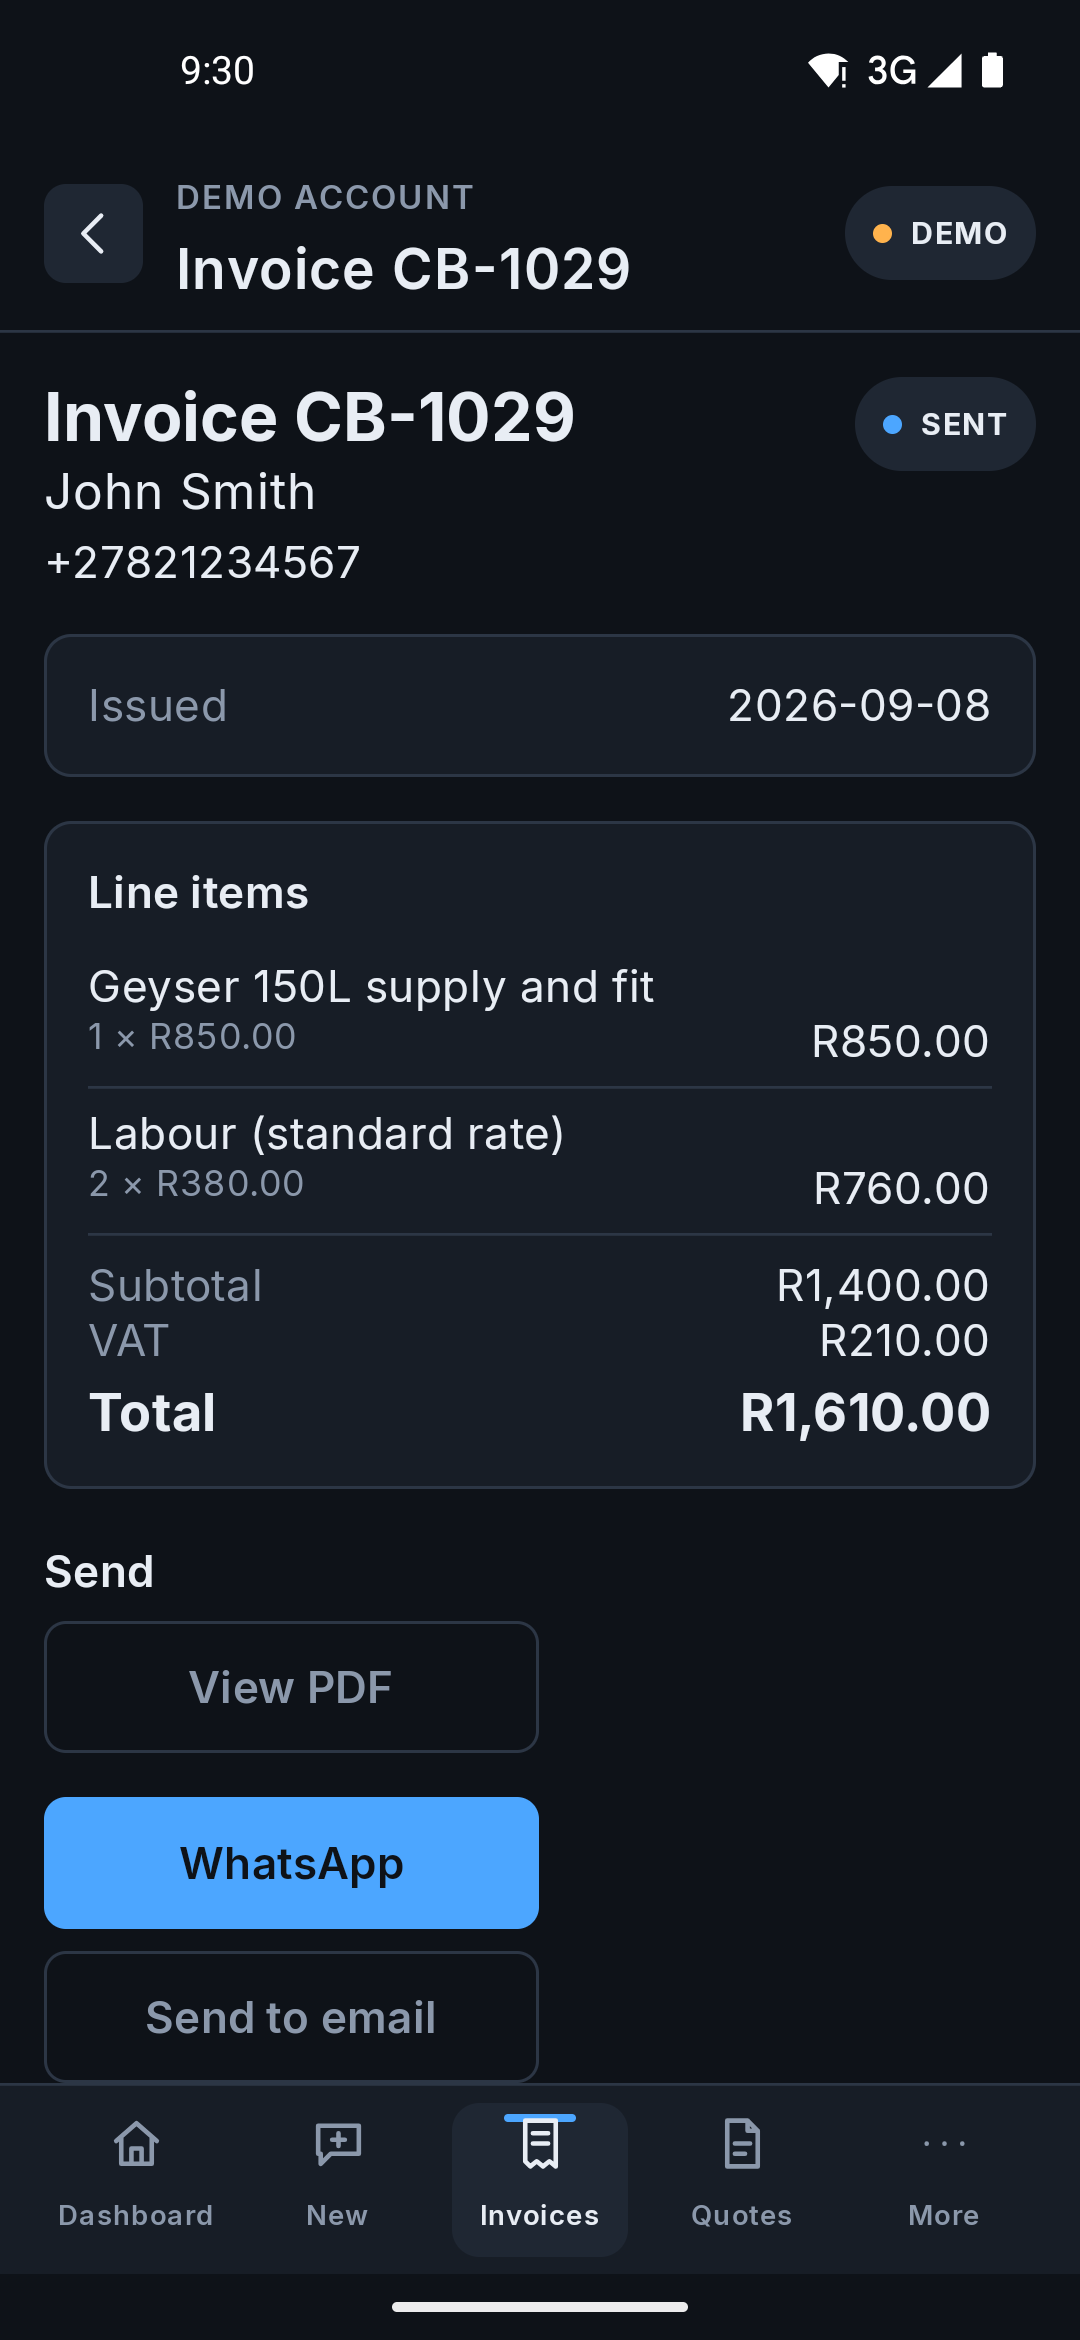 Android app
 -
7. Email it instead
Send invoice (or Send quote) on that page opens a second way to reach your customer, alongside WhatsApp: type in their email address and ChatBill sends the PDF straight from your account, with the same link to view it online. It's ready to go the moment you land on this page; the address is only pre-filled if you already had one on file for that customer.
Emailing needs your own email address confirmed first. See Verify your account if the option isn't there yet.
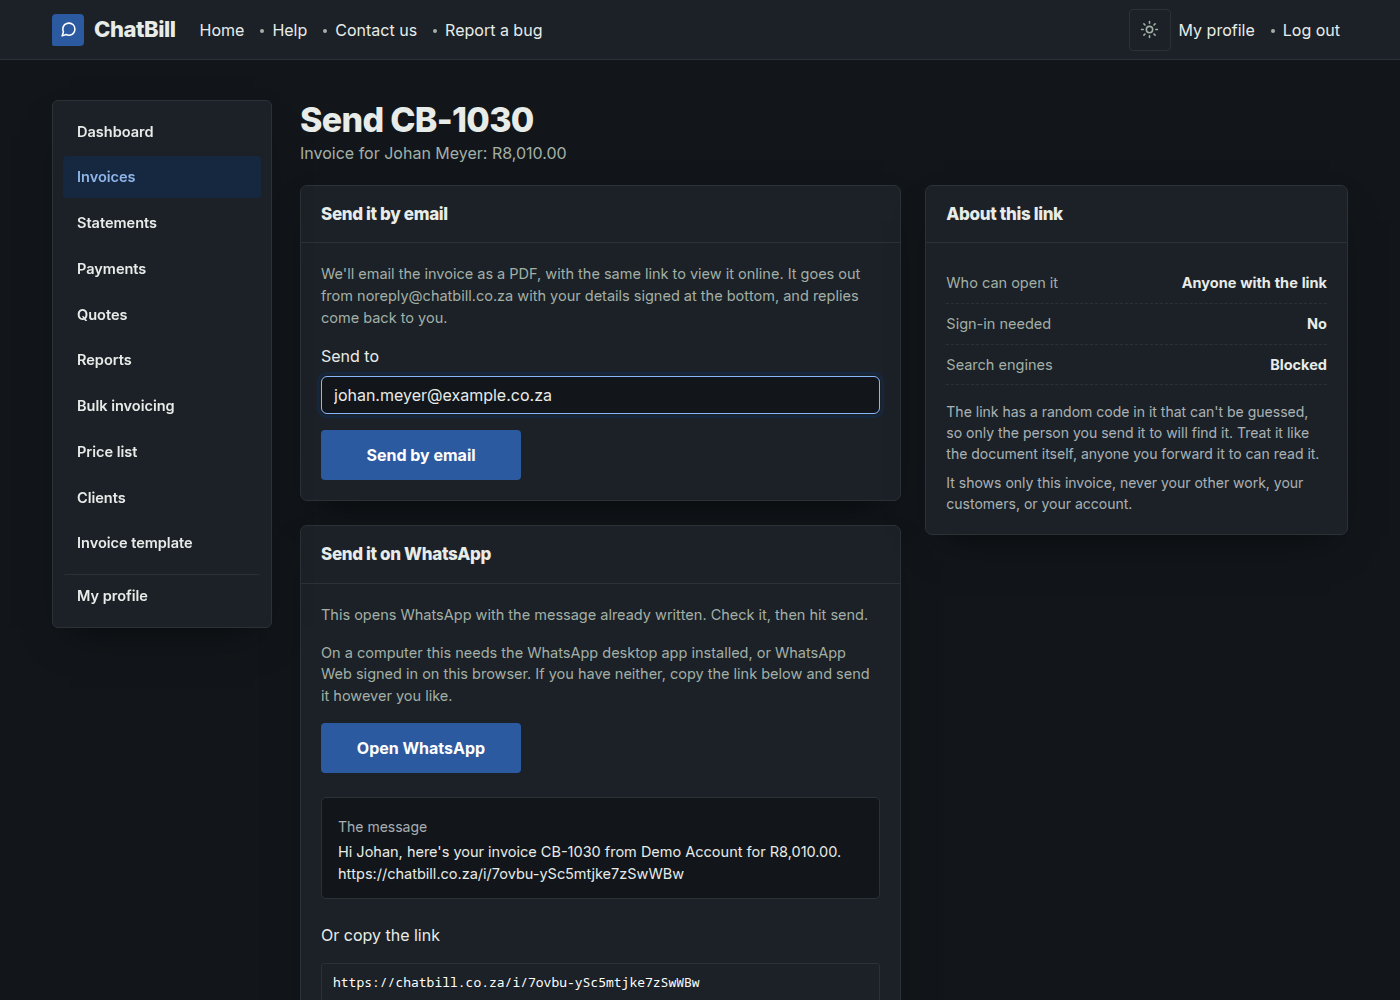 Website
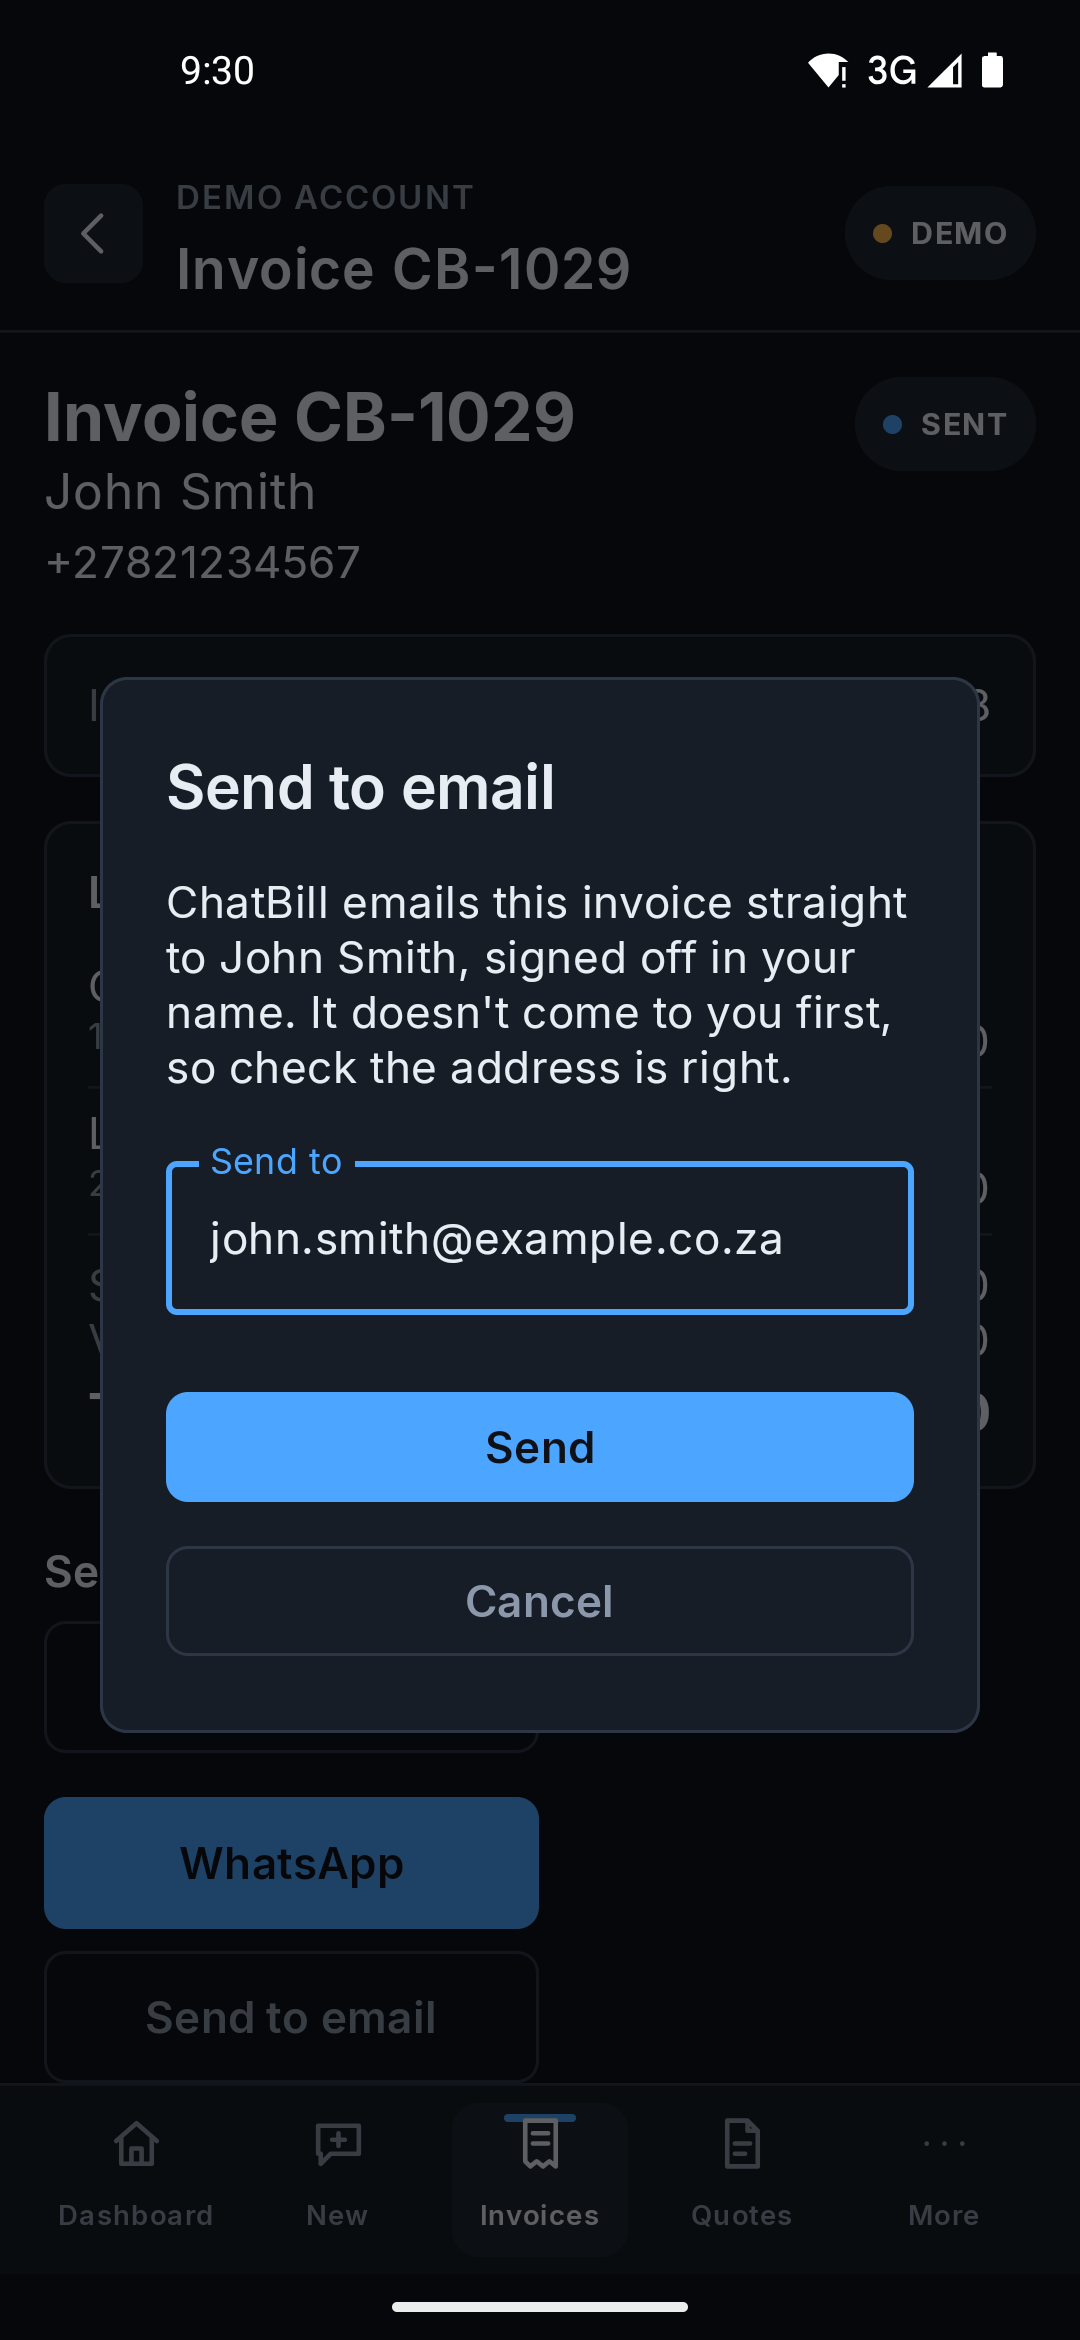 Android app
 -
A quote, side by side
The whole walkthrough above works the same way starting from + New quote instead. Its own page looks almost identical: a valid-until date in place of a due date, and Accepted/Declined buttons in place of Record a payment, since nothing is owed until the customer says yes.
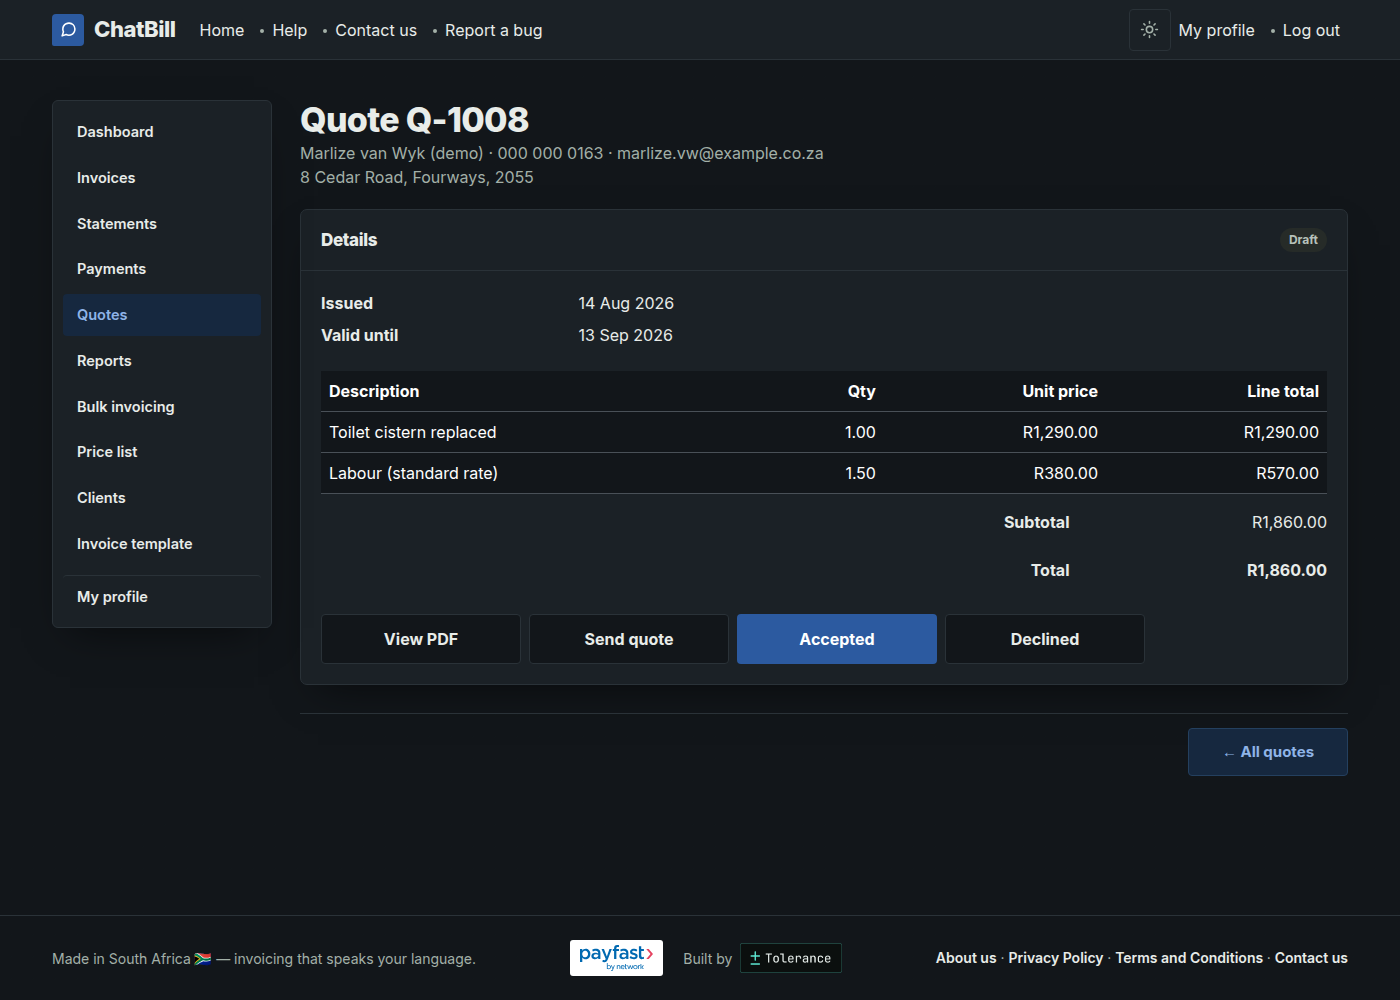 Website
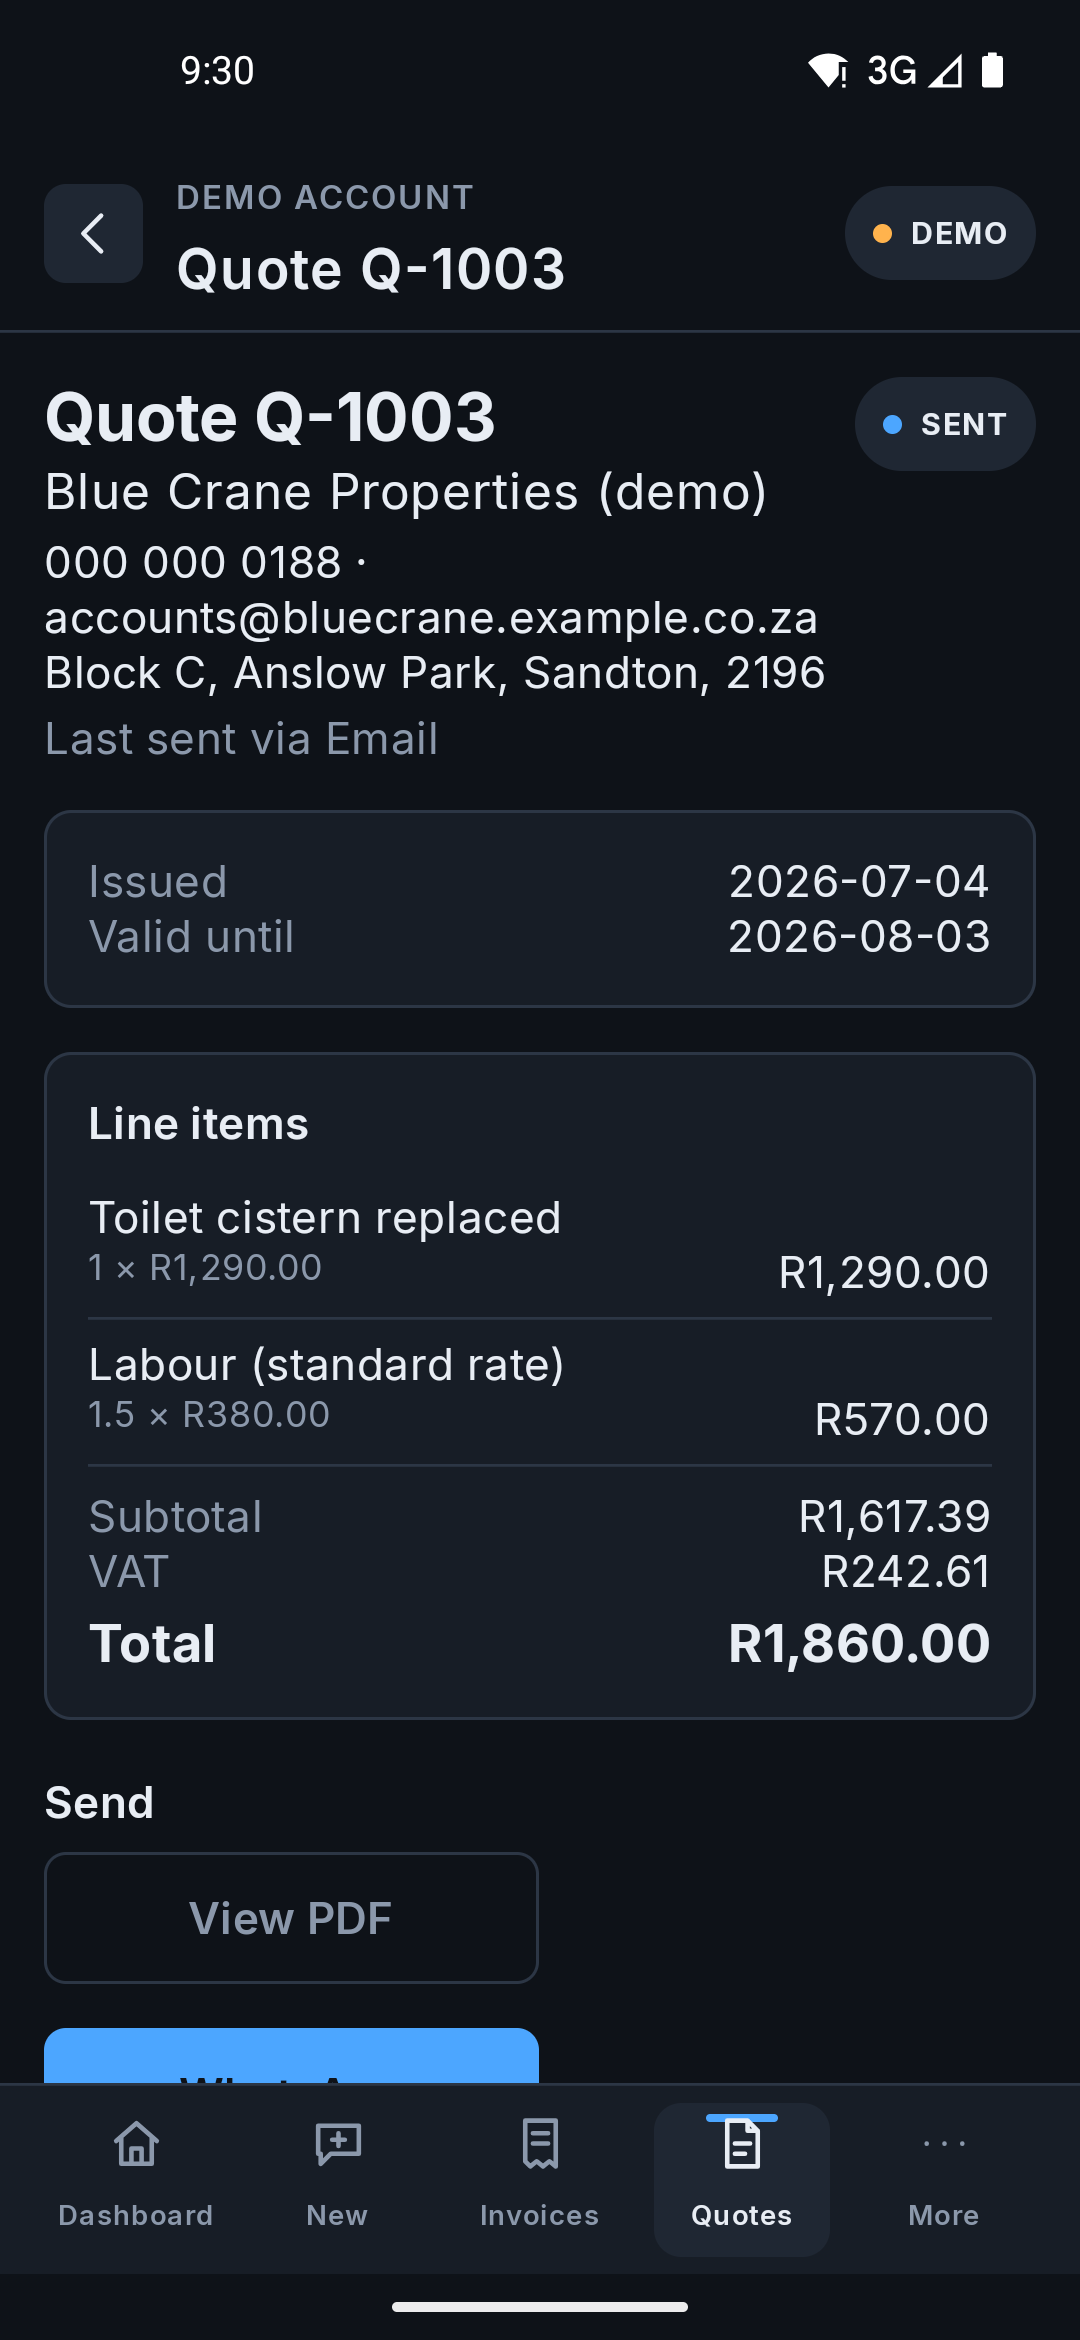 Android app


